On the ETM Course we teach intraosseous needle insertion using the EZIO system. EZIO essentially has a monopoly on intraosseous access, being used in almost all Emergency Departments and ambulance/pre-hospital systems around Australia and New Zealand.
The main downside however is that the proprietary drill is non-rechargeable. These drills cost $380.00 (AUD) each to purchase, and we go through several each year on our courses. When they go flat the only option so far has been to put them in the bin and buy new ones, which is neither cost effective nor environmentally friendly.
Inspired by recent hacks we learned about making non-rechargeable devices rechargeable (like the McGrath Video Laryngoscope) we have developed a way to get the existing 6 x 3 Volt batteries out of an EZIO drill and replace them with two rechargeable 9 Volt batteries, at a cost of around $40.00 AUD.
We have just done this to 6 flat drills we had laying around, saving them from landfill and saving $2000 in the process.
We can’t advocate this process for drills in clinical use as it probably won’t pass your hospital’s electrical safety/engineering scrutiny (and will certainly void any warranty from the company), but for teaching this is a great way to save money and the environment!
EZIO Drill battery replacement – equipment you will need:
- Pencil
- Dremel (or similar) with circular cutting blade
- Soldering iron, solder
- 9V battery clips x 2 (per drill)
- Heat shrink tubing & lighter/heat source
- Electrical tape (optional)
- Scissors
- Pliers/cutters
- Fine grit sandpaper
- Stanley knife/utility knife/razor blade
- 2 x rechargeable 9V batteries per drill – see notes at the end on battery selection
- 9V battery charger
Step 1
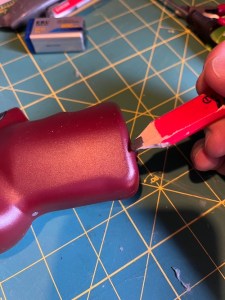
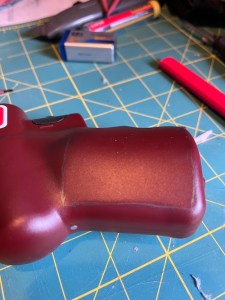
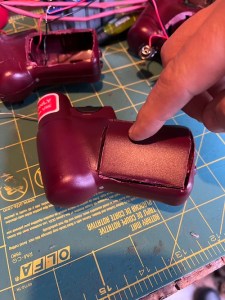
Look at the drill handle under indirect light, you can see where the ridges on the handle catch the light. Using a pencil draw a roughly rectangular shape to guide the cuts in the handle. Before starting the cut, place a 9V battery over the shape you’ve drawn to ensure it will fit the two 9V batteries you’ll need to insert.
Step 2
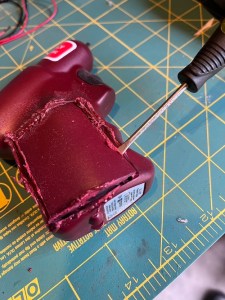
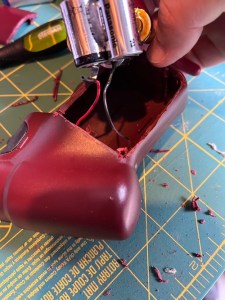
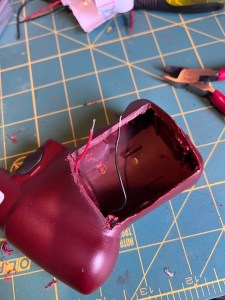
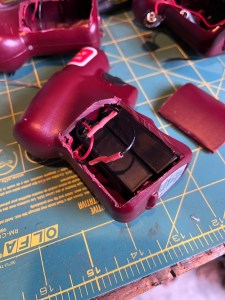
Using the Dremel, cut along the lines. The plastic will melt/ball-up a bit, don’t worry it is easy to remove. It can take a few goes to get all the way through as the plastic is quite thick. You may need to lever the “hatch” off with a small screwdriver.
You’ll see two thin plastic tabs on the inner side of the hatch piece, and the same inside the drill. Use pliers to twist/pull these off. Use the Stanley knife & sandpaper to trim/sand any bits of excess plastic/rough edges off the drill & hatch piece.
Step 3
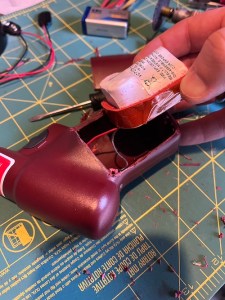
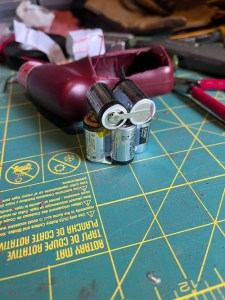
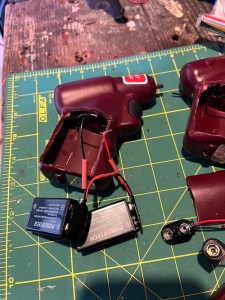
Remove the hatch and place it to one side, and remove the battery pack. You may need to reach in and cut off the bit of brown rubber around the batteries so they fit through the hole. Remove the white plastic wrapping from the batteries and cut the red and black wires as close to the battery terminals as possible (as you want the wires coming from inside the drill as long as possible).
Step 4
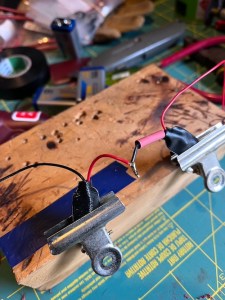
Grab the two 9V battery clips, place them side by side so there is one red and one black wire from each adjacent to each other. Cut these two wires so they are about 5cm long, then twist and solder the ends together (be sure to place a piece of heat shrink over one end before soldering), then slide the shrink tubing over the join & heat it with a lighter to shrink it down.
Step 5
Attach the red and black wires from the joined battery clips to the corresponding wires in the drill (red to red, black to black), then attach your batteries and squeeze the trigger, the drill should run. Then solder the wires together (again, being sure to have a piece of heat shrink tubing in place before soldering), slide the shrink tubing over the join and heat it to shrink around the connections.
Step 6
After the connections are soldered, attach the fully charged 9V batteries to the clips, and gently place them in the hatch. Squeeze the trigger to ensure the drill is working. We found that having the clips toward the top fits best. Then gently fold the wires down the side/over the top of the batteries, place the hatch cover over them and wrap electrical tape around the handle to secure it in place.
Your drill is now ready to use!
IMPORTANT – Battery selection
Please note – not all 9V batteries are the same!
We tried this project initially with the EBL 600mAH Lithium ion rechargeable 9V batteries (from Dingoship) as we assumed the higher mAH output would give them more longevity. But unfortunately we didn’t read the tech specs carefully enough.
These batteries actually only deliver 8.2-8.4V, not 9V (which we later found out by reading some Amazon reviews. (look at the reviews with photos).
Hence when two of these were connected to the drill, they only delivered 16.6-16.8V which was not enough to power the drill (which requires 18V).
We ended up using Powertech 9V/200mAh rechargeable batteries from Jaycar, which also state they are 8.4V on the side (similar to these)
When charged/tested they deliver over 9V.
When combined they deliver nearly 19V and when used in the EZIO drill worked perfectly!
We assume this is due to a difference in the cell type used in the batteries
Take home point – beware when buying 9V batteries that you actually get ones that deliver enough volts for your project.
So there you have it, and easy and cheap way to infinitely extend the life of your training EZIO driver drills!
Hey, are you interested in accessing more online learning from ETM? Then head over to ETM Online and check out our new online Toxicology Course!


